Showing posts with label article. Show all posts

Understanding Histograms

NO comments
From time to time someone asks me to write some article. This time it will be about Histograms, so I'm posting an article (mostly) based on Luminous Landscape. If you are new to photography I’m sure you will find this info really useful.

Possibly the most useful tool available in digital photography is the histogram. It could also well be the least understood. In this article we will look at what a camera histogram tells the photographer and how best to utilize that information.

The 21st Century Light Meter

I am frequently asked why I frequently look at the LCD of my DSLR after taking a shot. The answer is that I’m barely even aware of the image on the LCD, it’s the histogram that commands my attention.


In Bloom. Costa Rica — February, 2003
Canon EOS 1Ds with 16-35mm f/2.8L lens @ 24mm. ISO 200

This histogram shows an almost perfect distribution of tones covering about a 4 stop dynamic range — from deep shadows on the left to just short of bright highlights on the right. This fits comfortably within the approximately 5 stop dynamic range capability of most digital imaging chips.

A light meter reading tells you what exposure will render a standard 18% gray reference card as a mid tone. This reading may have been made because the camera read a variety of areas of the scene and averaged them out, or because you read the highlights, the shadows and some other areas and decided that a particular setting would yield the best compromise exposure for that scene.

This setting, like every other that you or your automated camera makes, is a compromise. In most real world situations there is no such thing as an ideal or “perfect” exposure. There is simply one that places the tonal values found in the scene most appropriately within the capability range of the camera’s imaging chip. And “most appropriately” means that the mid-tones found in the image fall roughly half way between the darkest and the brightest values. Hold that thought while we digress for a moment and look at the concept of dynamic range.

Dynamic Range

The digital imaging chip in your camera is very similar to colour transparency film when it comes to its sensitivity to light.

Like slide film, if a part of the image receives too much light it becomes burned out, and if too little light it is rendered as black. A recognizable image is only recorded if the light hitting the chip falls within a range of about 5 F stops. (Remember — each F stop is a doubling or halving of the amount of light hitting the film). With digital things are much the same and even the dynamic range is about the same as for slide film; about 5 stops. Also keep in mind that the total range of brightness values encountered in the real world is only about 10 stops — from the dimmest light that you can read in to the brightest beach or snow scene in which you might find yourself).


Surf & Turf. Big Sur California — February, 2003
Canon EOS 1Ds with 135mm f/2.0L lens @ ISO 100

In an image recorded in 8 bit mode (we’ll ignore 12 , 14 and 16 bit modes for this tutorial) there are 256 discrete brightness levels between absolute black (0) and absolute white (255). 18% gray (the point that all exposure metering measures) has a numeric value of about 128, half way between black and white. If you think about it this is fairly logical. This means that if you are exposing for an average subject, say something like a scene with people, trees, grass etc, these subjects will be exposed at about the mid point of the camera’s dynamic range. Why is this important?

This is because if a subject is exposed too close to either extreme you will run into the limitations of the chip’s ability to record the image. Too close to 0 (absolute black) and there won’t be an image at all, or it will be very dark and noisy, and too close to 255 (absolute white) and there will be nothing there except oversaturated pixels with no image information.

The Histogram

This is where the histogram comes in. It is a simple graph that displays where all of the brightness levels contained in the scene are found, from the darkest to the brightest. These values are arrayed across the bottom of the graph from left (darkest) to right (brightest). The vertical axis (the height of points on the graph) shows how much of the image is found at any particular brightness level.

Note that I somewhat arbitrarily labeled each of the five zones (or F stops) containing the dynamic range recordable by the cameras as Very Dark / Dark / Medium / Light / Very Light. But each of these 1 stop ranges contains within it just over 50 discrete brightness levels. (5X50=250 not 256, but who’s counting?) Seriously though, it’s a good idea to consider about 4- 5 points at the very bottom (black) and another 4-5 points at the very top of the scale (white) to be so close to the extremes as to not really be part of the image-forming segment of the graph. (NB: This is an oversimplified explanation. For how the data is really distributed please read Expose to the Right.)

This view of the rear LCD on a Canon 1Ds shows a histogram for a particular shot and also the dotted vertical lines that Canon has engraved on the display separating the 5 stops of dynamic range that are available. As you can see this image has most of its content either in the shadows, or the highlights, with little in the mid-range.

Scanning The Scene. Costa Rica — February, 2003

So now things start to become clearer. The histogram shows us quite a bit, and just as a glance at the hands of an analogue watch instantly tell you the time without your even being conscious of the exact numeric values, similarly once you become proficient at “reading” a histogram you’ll be able to almost instantly evaluate the quality of the exposure that the camera is making. This is especially true when the histogram is superimposed on or just next to the image itself, making the graph that much more meaningful. Lets look at some examples.

Examples

As mentioned earlier, with the exception of a histogram that is very heavily bunched up to the right (overexposed) there really isn’t such a thing as a “bad” histogram, or for that matter a “good” one. The histogram simply shows you the way things are, and its then up to you to decide if what it is telling you needs to be acted upon. Here are some examples.

Here we see the same photograph taken with exposures about three and a half stops apart. Both were at an aperture of f/9. The one on the left was shot at 1/2000 sec and the one on the right at 1/200 sec. The histogram of the one at the left is bunched up at the dark end (underexposed) and the one on the right is bunched up at the light end (overexposed).

There wasn’t an exposure with today’s digital (or transparency film) cameras that could encompass the full dynamic range of this photograph — which is about 8 stops. You therefore have to make some decisions on how to handle such a scene. To stuff 8 stops worth of dynamic range into a recorded image that can only handle 5 stops your choices are….

— use balanced fill flash on the foreground

— use a graduated neutral density filter

— take multiple exposures and merge them digitally

— go home

Fill flash wouldn’t work in this case because the foreground subject was too large and too distant. I didn’t have any graduated neutral density filters with me (I no longer use them), and going home wasn’t what I had in mind. Instead I shot the two frames seen above at about 3 1/2 stops apart and merged them digitally using one of the processes described in Digital Blending. The image below is the result. Not great art, but it illustrates the point.

Histograms Just “Are”

As mentioned earlier, with the possible exception of showing badly blown out highlights there really is no such thing as a bad histogram. They just are.

This low key shot’s histogram shows that almost all of the data in the image is down in the lowest areas (darkest) with just a small amount of data showing the bright moon. But since the dark areas aren’t right up against the left hand side and the light areas aren’t up against the right hand side of the histogram, the subject falls within the dynamic range that can be captured. The detail in the moon is what “makes” this shot.

In this “high key” image we see just the opposite. Almost every value seen is toward the right side of the histogram, in the highlight area. That’s where I wanted it to be to properly reproduce the brightness found in this snow scene. Yet, since it doesn’t bump up against the right hand side of the histogram I know that none of the highlights are blown out.

Not too long ago a histogram was something mysterious. Today it has become a valuable tool for the photographer who wants to gain mastery of their digital camera’s image quality. I hope that this tutorial has helped remove some of the mystery for you.

Start using the histogram review feature of your digital camera. Set your camera to display a combined thumbnail and histogram for 5-10 seconds after every frame. Get in the habit of glancing at it. It’s the greatest invention since the built-in light meter.


Read More!
or Understanding HistogramsSocialTwist Tell-a-Friend Traducir al Español / Translate

Translation / Traducción / Tradução / Traduzione

3comments
Plenty of people (at least 5 persons in last 2 weeks!) asked for Translation of my blog, so here you have: Automatic Translation by Google. Please don't click on the above flags to get your translation because this is just (part of) a screenshot! The actual Translation Flags are located on every page (at the very bottom), just above of my Copyright note (as you see it in the image at the top of this post).

Most of my posts are written in English because English is the "Universal Language" and I want to reach the whole world! ;) So why I have the US Flag as the 1st choice even when posts are written in English? Because sometimes comments are posted in Spanish, Portuguese or Italian... so clicking on the US flag will give you "full" English. :)

Note: even tags are translated so you can have a better idea about the image... you can even click on them and google will do its job! :)

So... very nice flags but where is the image of today? Wait! I will come up with something soon!


Traducción (Spanish)
Mucha gente (por lo menos 5 personas en las 2 últimas semanas!) Pide la traducción de mi blog, así que aquí tienes: la traducción automática por Google. Por favor, no haga clic sobre las banderas para obtener su traducción, porque esto no es más que (parte de) una captura de pantalla! Las Banderas reales para la traducción se encuentran en cada página (en la parte inferior), justo por encima de mi nota de Derecho de Autor (como se ve en la imagen en la parte superior de esta entrada).

La mayoría de mis posts están escritos en Inglés porque éste es el "idioma universal" y quiero llegar a todo el mundo! ;) Entonces, ¿por qué tengo las bandera de los EE.UU. como la 1ª elección aún cuando están escritas en Inglés? Porque a veces los comentarios se publican en español, portugués o italiano... Por lo tanto al hacer clic en la bandera de los EE.UU. obtendrá "pleno" Inglés. :)

Nota: las etiquetas son incluso traducidas para que pueda tener una mejor idea acerca de la imagen... Incluso se puede hacer clic en ellas y Google hará su trabajo! :) :),

Así que... banderas muy bonitas pero ¿dónde está la imagen de hoy? Espere! Ya vendré con algo pronto!


Tradução (Portuguese)
Plenty of people (at least 5 persons in last 2 weeks!) asked for Translation of my blog, so here you have: Automatic Translation by Google . Abundância de pessoas (pelo menos 5 pessoas nos últimos 2 semanas!) Pediu para tradução do meu blog, por isso aqui você tem: a tradução automática pelo Google. Please don't click on the above flags to get your translation because this is just (part of) a screenshot! Por favor, não clique nos pavilhões acima para obter a sua tradução, porque esta é apenas (em parte) uma tela! The actual Translation Flags are located on every page ( at the very bottom ), just above of my Copyright note (as you see it in the image at the top of this post). O atual Tradução Bandeiras estão localizadas em cada página (na parte inferior), pouco acima do meu Copyright nota (como você vê na imagem no topo deste post).

Most of my posts are written in English because English is the "Universal Language" and I want to reach the whole world! A maioria dos meus posts estão escritos em Inglês, porque Inglês é a "língua universal" e que gostaria de chegar a todo o mundo! ;) So why I have the US Flag as the 1st choice even when posts are written in English? ;) Então, por que eu tenho os E.U. Bandeira como a 1 ª opção, mesmo quando as mensagens são escritas em Inglês? Because sometimes comments are posted in Spanish, Portuguese or Italian... Porque às vezes comentários são publicados em Espanhol, Português ou italiano ... so clicking on the US flag will give you "full" English. assim clicando sobre os E.U. bandeira lhe dará "completo" Inglês. :) :)

Note: even tags are translated so you can have a better idea about the image... Nota: mesmo tags são traduzidas para que você possa ter uma idéia melhor sobre a imagem ... you can even click on them and google will do its job! você pode clicar sobre eles e até mesmo o Google irá fazer o seu trabalho! :) :)

So... Então ... very nice flags but where is the image of today? very nice bandeiras, mas onde está a imagem de hoje? Wait! Aguardar! I will come up with something soon! Vou chegar a algo em breve!


Traduzione (Italian)
Plenty of people (at least 5 persons in last 2 weeks!) asked for Translation of my blog, so here you have: Automatic Translation by Google . Un sacco di persone (almeno 5 persone negli ultimi 2 settimane!) Ha chiesto per la traduzione del mio blog, in modo che avete qui: Traduzione automatica da Google. Please don't click on the above flags to get your translation because this is just (part of) a screenshot! Si prega di non cliccare sul flag di cui sopra per ottenere la traduzione, perché questo è solo (in parte) uno screenshot! The actual Translation Flags are located on every page ( at the very bottom ), just above of my Copyright note (as you see it in the image at the top of this post). L'effettiva traduzione Bandiere si trovano in ogni pagina (in basso), appena al di sopra del mio Copyright nota (come si vede nella immagine in alto di questo post).

Most of my posts are written in English because English is the "Universal Language" and I want to reach the whole world! La maggior parte dei miei post sono scritti in inglese, perché l'inglese è la "lingua universale" e voglio raggiungere il mondo intero! ;) So why I have the US Flag as the 1st choice even when posts are written in English? ;) Quindi, perché ho la bandiera degli Stati Uniti come il 1 ° scelta, anche quando posti sono scritte in inglese? Because sometimes comments are posted in Spanish, Portuguese or Italian... Perché a volte i commenti sono pubblicati in spagnolo, portoghese o italiano ... so clicking on the US flag will give you "full" English. quindi cliccando su la bandiera degli Stati Uniti vi darà "pieno" in inglese. :) :)

Note: even tags are translated so you can have a better idea about the image... Nota: anche i tag vengono tradotti in modo da avere una migliore idea per l'immagine ... you can even click on them and google will do its job! si può anche fare clic su di essi e Google farà il suo lavoro! :) :)

So... Quindi ... very nice flags but where is the image of today? molto bello, ma le bandiere dove è l'immagine di oggi? Wait! Attendere! I will come up with something soon! Io verrò con qualcosa presto!

free counters
Read More!
or Translation / Traducción / Tradução / TraduzioneSocialTwist Tell-a-Friend Traducir al Español / Translate

Depth of Field in Photography

2comments
I borrowed this article from Fredrik Silverglimth in Photography, Photography BasicsDepth of Field

Depth of field (DOF) is the distance in front and beyond the object that is in focus. This tutorial will teach you about how to use Depth of Field in your own photography.

Depth of Field in Photoshop

In case you’re looking for a way to imitate Depth of Field in Photoshop (rather than photography, as this tutorial illustrates), we’ve got a great tutorial that will teach you how to enhance your graphics with depth of field in photoshop here at Tutorial9!

A short depth of field can be very useful when you want to isolate your object from the background, such as when taking portraits or macro photography. A large depth of field is great when you photograph landscapes and overall when you want every detail to be in focus.


Control the Depth of Field

There are three variables that affect DOF, the size of the Aperture, the distance to the object and what lens you’re using. (There is a fourth thing that affects the DOF, but that’s the size of the sensor and unless you have two cameras with different sensor sizes this isn’t something to take into account.)

dof_aperture Depth of Field in Photography
As you can see in the illustration above, a lower f-number equals a shorter depth of field. A higher f-number will give you focus over a longer distance — when you’re having a hard time getting the correct focus it might be a good idea to extend your DOF by changing the aperture.

dof_distance Depth of Field in Photography
The distance between you and the object is also important, the closer you are to the object the shorter the DOF. If you’re photographing a person but needs to have a high f-number you can still get a very short DOF by keeping the distance between you and the person to a minimum.

dof_lens Depth of Field in Photography
The last thing you can do to affect your DOF is to change the lens. A wide-angle lens has a much greater DOF than a telephoto lens; the most extreme wide-angle and fish-eye lenses don’t even have to focus because they are so sharp on every aperture for the entire DOF (making for excellent scenic shots).

It’s important to know that the depth of field is greater behind the object than in front of it. If you want to photograph, let’s say 20 kids standing in a line, and you want as many of them as possible to be in focus, but you’re unable to have a small aperture, you should focus on the 6th-7th kid in line, which would balance the field of focus about right (depending on your distance to the kids). If you would focus on the 10th kid, that is the one in the middle, the first few kids would be more out of focus than the kids at the back of the line.

Unlike some other parts of photography, the depth of field works in your favor almost every time. If you want to photograph landscapes you usually have a wide-angle lens — the object is far away and you use a high f-number — all these things together gives you a depth to infinity. And if you’re photographing macro you’re close to the object, you have a telephoto lens and often a low f-number — all these things will give you a very short depth which will make your object stand out and make the background soft and non-distracting.

Bokeh

The word Bokeh derives from the Japanese word Boke which means “blur” or “fuzzy“, and that’s just what the term refers to in photography. The out of focus areas in the photograph look very different depending on the depth of field as well as the lens used, some lenses produces much better bokeh than other lenses. The shape of the aperture is one of the most important parts together with the quality of the optics when it comes to how the out of focus areas appear.

bokeh Depth of Field in Photography
The photograph above is meant to illustrate what bokeh is. The lens used was the Canon 50mm f/1.8 which isn’t considered to be a good bokeh lens due to it’s 5 aperture blades.

Read More!
or Depth of Field in PhotographySocialTwist Tell-a-Friend Traducir al Español / Translate

Three articles on High Dynamic Range Photography (HDR)

NO comments
I keep receiving requests to talk about High Dynamic Range (HDR) Photography, specially from friends… Since I don’t have the time to do it (or my PhD advisor will kill me!) I will post just 3 URLs… Hope now everything looks better, well that’s the idea behind HDR!
Read More!
or Three articles on High Dynamic Range Photography (HDR)SocialTwist Tell-a-Friend Traducir al Español / Translate

Panning

NO comments

Today I’d like to take a brief look at moving subjects by ‘panning’.

Panning is a technique that can produce amazing results (if you perfect it…. or get lucky) but is also one that can take a lot of practice to get right.

The basic idea behind panning as a technique is that you pan your camera along in time with the moving subject and end up getting a relatively sharp subject but a blurred background.

This gives the shot a feeling of movement and speed. It’s particularly useful in capturing any fast moving subject whether it be a racing car, running pet, cyclist etc.

I’ve found that panning seems to work best with moving subjects that are on a relatively straight trajectory which allows you to predict where they’ll be moving to. Objects that are moving side to side are challenging and can result in messy looking shots as the motion blur can be quite erratic.


How do you do it?

  • Select a slightly slower shutter speed than you normally would. Start with 1/30 second and then play around with slower ones. Depending upon the light and the speed of your subject you could end up using anything between 1/60 and 1/8 - although at the slower end you’ll probably end up with camera shake on top of your motion blur.
  • Position yourself in a place where your view of the subject will not be obstructed by anyone or anything else. Also consider the background of your shot. While it will be blurred if there are distracting shapes or colors it could prove to be distracting. Single coloured or plain backgrounds tend to work best.
  • As the subject approaches track it smoothly with your camera. For extra support of your camera if you’re using a longer lens or are feeling a little jittery you might like to use a monopod or tripod with a swivelling head.
  • For best results you’ll probably find that setting yourself up so that you’re parallel to the path of your object (this will help with focussing).
  • If you have a camera with automatic focus tracking you can let the camera do the focussing for you by half pressing the shutter button (depending upon it’s speed and whether it can keep up with the subject)

  • If your camera doesn’t have fast enough auto focussing you’ll need to pre-focus your camera upon the spot that you’ll end up releasing the shutter.
  • Once you’ve released the shutter (do it as gently as possible to reduce camera shake) continue to pan with the subject, even after you’ve heard the shot is complete. This smooth follow through will ensure the motion blur is smooth from start to finish in your shot.
  • If you have an older digital camera or one that is of a more entry level point and shoot variety you could also have to contend with the dreaded ’shutter lag’ problem. Shutter lag is when there is a slight delay from when you press the shutter to when the picture is actually taken. If you experience shutter lag you’ll need to learn to anticipate the moment to take the shot and will definitely need to continue to pan well after you’ve taken the shot.

A variation on the Panning Technique

There are no rules with panning and you might also like to experiment with using your flash while panning. This will only work if the subject is close enough or your flash is powerful enough to have an impact - but will help to further freeze your main subject while giving the background the motion blur you’re after.
If you do use a flash you’ll want to test a variety of settings to get it looking right. In some cases you’ll probably need to pull back the strength of your flash by a half or a third.

Panning and Patience


If you’re going to try panning for the first time you should approach it with an experimental attitude. It can be a lot of fun but can also be quite frustrating. If you’re at a special event where you have fast moving subjects (like a car race etc) you’ll probably want to mix up your style of shooting. Don’t just use this technique all day - instead also shoot some shots at fast shutter speeds. This way you’ll end up with a variety of shots and will probably end up with some useful ones instead of just having a collection of blurry unusable ones.

If you want to practice panning (and it is something that you need to practice - a lot), head out into a busy part of your city and practice on passing traffic. That way you have a never ending supply of subjects.

Also keep in mind that it’s unlikely that your main subject will ever be completely sharp and in focus. This technique is about getting a relatively sharp subject in comparison to it’s background. Some blurring of your main subject can actually add to the feeling of motion in the shot.

Read More!
or PanningSocialTwist Tell-a-Friend Traducir al Español / Translate

Camera modes

NO comments

AUTOMATIC MODES:

  • Auto — everything is on auto, including ISO, flash and image quality
  • Portrait — uses a large aperture to shorten the depth of field
  • Landscape — uses a small aperture to gain more depth of field
  • Sport — uses higher ISO to use faster shutter speeds
  • Night portrait — uses long exposures to capture the entire scene, often combined with built in flash
  • Macro — uses a large aperture to great a softer background

Just Say NO! to Automatic Modes

There is no reason what so ever to use the automatic modes. After you’ve read through this series of articles about photography you should have enough knowledge to control the camera on manual modes — which will result in better photographs.

The Program mode (P) is fine to use, this way you will have the aperture and shutter automatic but still be in control over everything else. Most photographers find a mode that they like and maybe switches between two different modes, this is personal preferences and let me just tell you that far from every professional photographers uses only the fully Manual setting.

I personally use M and Av most of the time, depending on the situation. Av for the situations where I don’t have enough time to set the correct exposure between every shot and then M for the rest.

I usually shoot (perhaps about 80% of my photos) in the Av mode since I use only RAW and I can do some PP if my camera picked a bad shutter speed… and since I have a Canon 40D that’s not the frequent case! Anyway, If I find myself compensating (EV +/-) exposure too often, then I change to M :) … you need the Av mode if you can’t corrext exposure between every shot, for example if you are taking photographies of (wild) children! :)

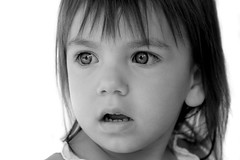
Cute Martina

Did you think this cute girl of two years old would wait for me to prepare the perfect shot? I think these shots took me about 2 hours! :)

Read More!
or Camera modesSocialTwist Tell-a-Friend Traducir al Español / Translate

Diffraction and Photography

NO comments

This is my 1st post here... I think it will be much more useful than the classic "Hello World".

I was wondering what’s the best aperture for my favorite photography subject:land/cityscapes… Probably F8, perhaps F11… F8 is probably what old photographers would pick in order to have a sharp image without risking DoF.

Well, not an easy answer, it depends on the lens you are using, with a APS-C sensor the magic aperture should be at a bigger aperture (small F number), but where is this point?

Go check that sweet point at http://www.photozone.de and read about MTF (resolution) of the lens you are considering for your next shot! :)

I’ve found my sweet apertures are somewhere between F/4 and F/8 but, as always, YMMV.

Want to read theory about Diffraction? Please go here.

PS: Of course you can not always USE that sweet aperture, it will depend on the available light… if the sun is really really doing his thing then you will need an ND filter in order to use a bigger aperture, etc.

Read More!
or Diffraction and PhotographySocialTwist Tell-a-Friend Traducir al Español / Translate
 

Javier Echaiz Photography